Securely generating credentials for nRF91 Series devices
Once you have finished getting started with an nRF91 Series DK, you can securely generate credentials with the modem using the KEYGEN AT command. Using this method, the private key is not exposed and never leaves the modem.
The steps in this guide require modem firmware v1.3.x or later for the nRF9160 DK, and modem firmware v2.0.0 for the nRF9161 DK.
Generating credentials using AT commands
This method does not expose the private key.
To generate credentials on the device using AT commands:
-
To ensure the modem is deactivated, send the following AT command:
AT+CFUN=4In the output,
<sec_tag>is the slot in the modem where credentials are stored. The default<sec_tag>for nRF Cloud credentials is16842753. In most cases, this slot already contains credentials. You must delete these to inject new credentials in the steps that follow. Otherwise, you can use a different slot.To see which slots are currently used, use the
CMNGAT command:AT%CMNG=1 -
If you intend to use the default slot
16842753, delete the existing certificate and private key by first sending the following AT command:AT%CMNG=3,16842753,1When you see
OKin the terminal, issue the next command:AT%CMNG=3,16842753,2If you resend
AT%CMNG=1, you see a value only for type 0 (CA certificate). This is expected, as you are not injecting a new CA certificate. -
To generate a private key in the modem and receive the associated certificate signing request (CSR), execute the following AT command. If you are not using the slot
16842753, substitute the correct value.:AT%KEYGEN=16842753,2,0The
KEYGENcommand uses the default value of the nRF9160's UUID as theCNin the credential. If you are using a different device ID or MQTT client ID, update yourKEYGENcommand to use that ID as theCNvalue.The output of a successful
KEYGENcommand is a base64-encoded CBOR object. -
Convert the CBOR object to a certificate signing request (CSR) in PEM format using the modem_credentials_parser.py script. See the Modem Credentials Parser documentation for additional details.
Note
If you are manually copying and pasting the KEYGEN output, make sure to copy all characters of the base64 string that is enclosed in double quotes.
-
If you do not already have a CA certificate and private key, use the create_ca_cert.py script to create a CA and a key that you can use to sign all your device certificates.
- Use the CSR PEM file to create a device certificate with the create_device_credentials.py script. See the Create Device Credentials documentation for additional details.
-
If the device uses MQTT to connect to nRF Cloud, write the device certificate to the device using the same
<sec_tag>you used for theKEYGENcommand. See Managing credentials for details.After injecting the credentials, your device contains the private key in the
<sec_tag>provided to theKEYGENcommand, as well as a device certificate. -
Download an AWS Root CA certificate. This is required for communicating with nRF Cloud.
-
Write the CA certificate to your device using the same
<sec_tag>you used for theKEYGENcommand.The device now has the credentials it needs to use all of the nRF Cloud APIs:
- an AWS CA certificate
- a private key
- a device certificate for MQTT
Note
You can also perform all previous steps using just the device_credentials_installer.py script. For details, see the Device Credentials Installer documentation.
-
Onboard the device or register its public key, depending upon your protocol and which services you want to access:
-
A device that uses MQTT or the nRF Cloud FOTA service must be onboarded.
Use the
ProvisionDevicesendpoint to upload the device certificate, onboard the device on nRF Cloud, and add it to your nRF Cloud account.- Use the nrf_cloud_onboard.py script to perform the device onboarding to nRF Cloud. For more details, see the nRF Cloud Device Provisioning documentation.
- nRF Cloud REST APIs requiring a JSON Web Token (JWT): The device does not need to be onboarded.
Register the device's public key through the
RegisterPublicKeysendpoint.
For default or prebuilt Asset Tracker applications, onboard your device using the nrf-[IMEI] device ID. Otherwise, configure these applications to use the device UUID.
If your device already has an active SIM card installed, you can see the device in your account and connected after a restart.
Generating credentials on a computer
You can create credentials off-device and load them into the device later. This method is less secure, because it exposes the private key.
-
To create a device certificate and a key pair (public key and private key), use the create_device_credentials.py script. See the Create Device Credentials documentation for additional details. For the
-cnparameter (Common Name) tocreate_device_credentials.pyuse your device's nRF Cloud device ID. To use the device's internal UUID, see How to obtain the nRF9160's UUID.This step requires a CA certificate and its private key. If you do not already have one, use the create_ca_cert.py script to create a CA and key that you can use to sign all your device certificates.
-
Upload the device certificate to nRF Cloud using the
ProvisionDevicesendpoint.A successful call to the endpoint onboards the device and associates it with your nRF Cloud account. Devices that use MQTT or the nRF Cloud FOTA service must be onboarded and associated. If the device does not need to be onboarded but needs to use certain nRF Cloud REST APIs requiring a JWT, provide the public key generated above to nRF Cloud using the
RegisterPublicKeysendpoint. -
Write the private key to your device so that it can communicate with nRF Cloud through MQTT (for mTLS) or REST (for signing JWTs). Use the desired
<sec_tag>; typically16842753for nRF Cloud. See Managing credentials for details. -
If the device uses MQTT to connect to nRF Cloud, it needs the device certificate generated above. Write the device certificate to your device using the same
<sec_tag>as in previous steps. -
Download an AWS Root CA certificate. This is required for communicating with nRF Cloud.
-
Write the CA certificate to your device using the same
<sec_tag>you used for theKEYGENcommand.
The device now has:
- An AWS CA certificate.
- A private key.
- A device certificate for MQTT.
The device is ready to interact with nRF Cloud through REST or MQTT.
Managing credentials
Manage the credentials using the AT command CMNG, either through the AT command directly or the LTE Link Monitor Certificate manager.
Using the LTE Link Monitor Certificate manager
To use the Certificate manager, perform the following steps:
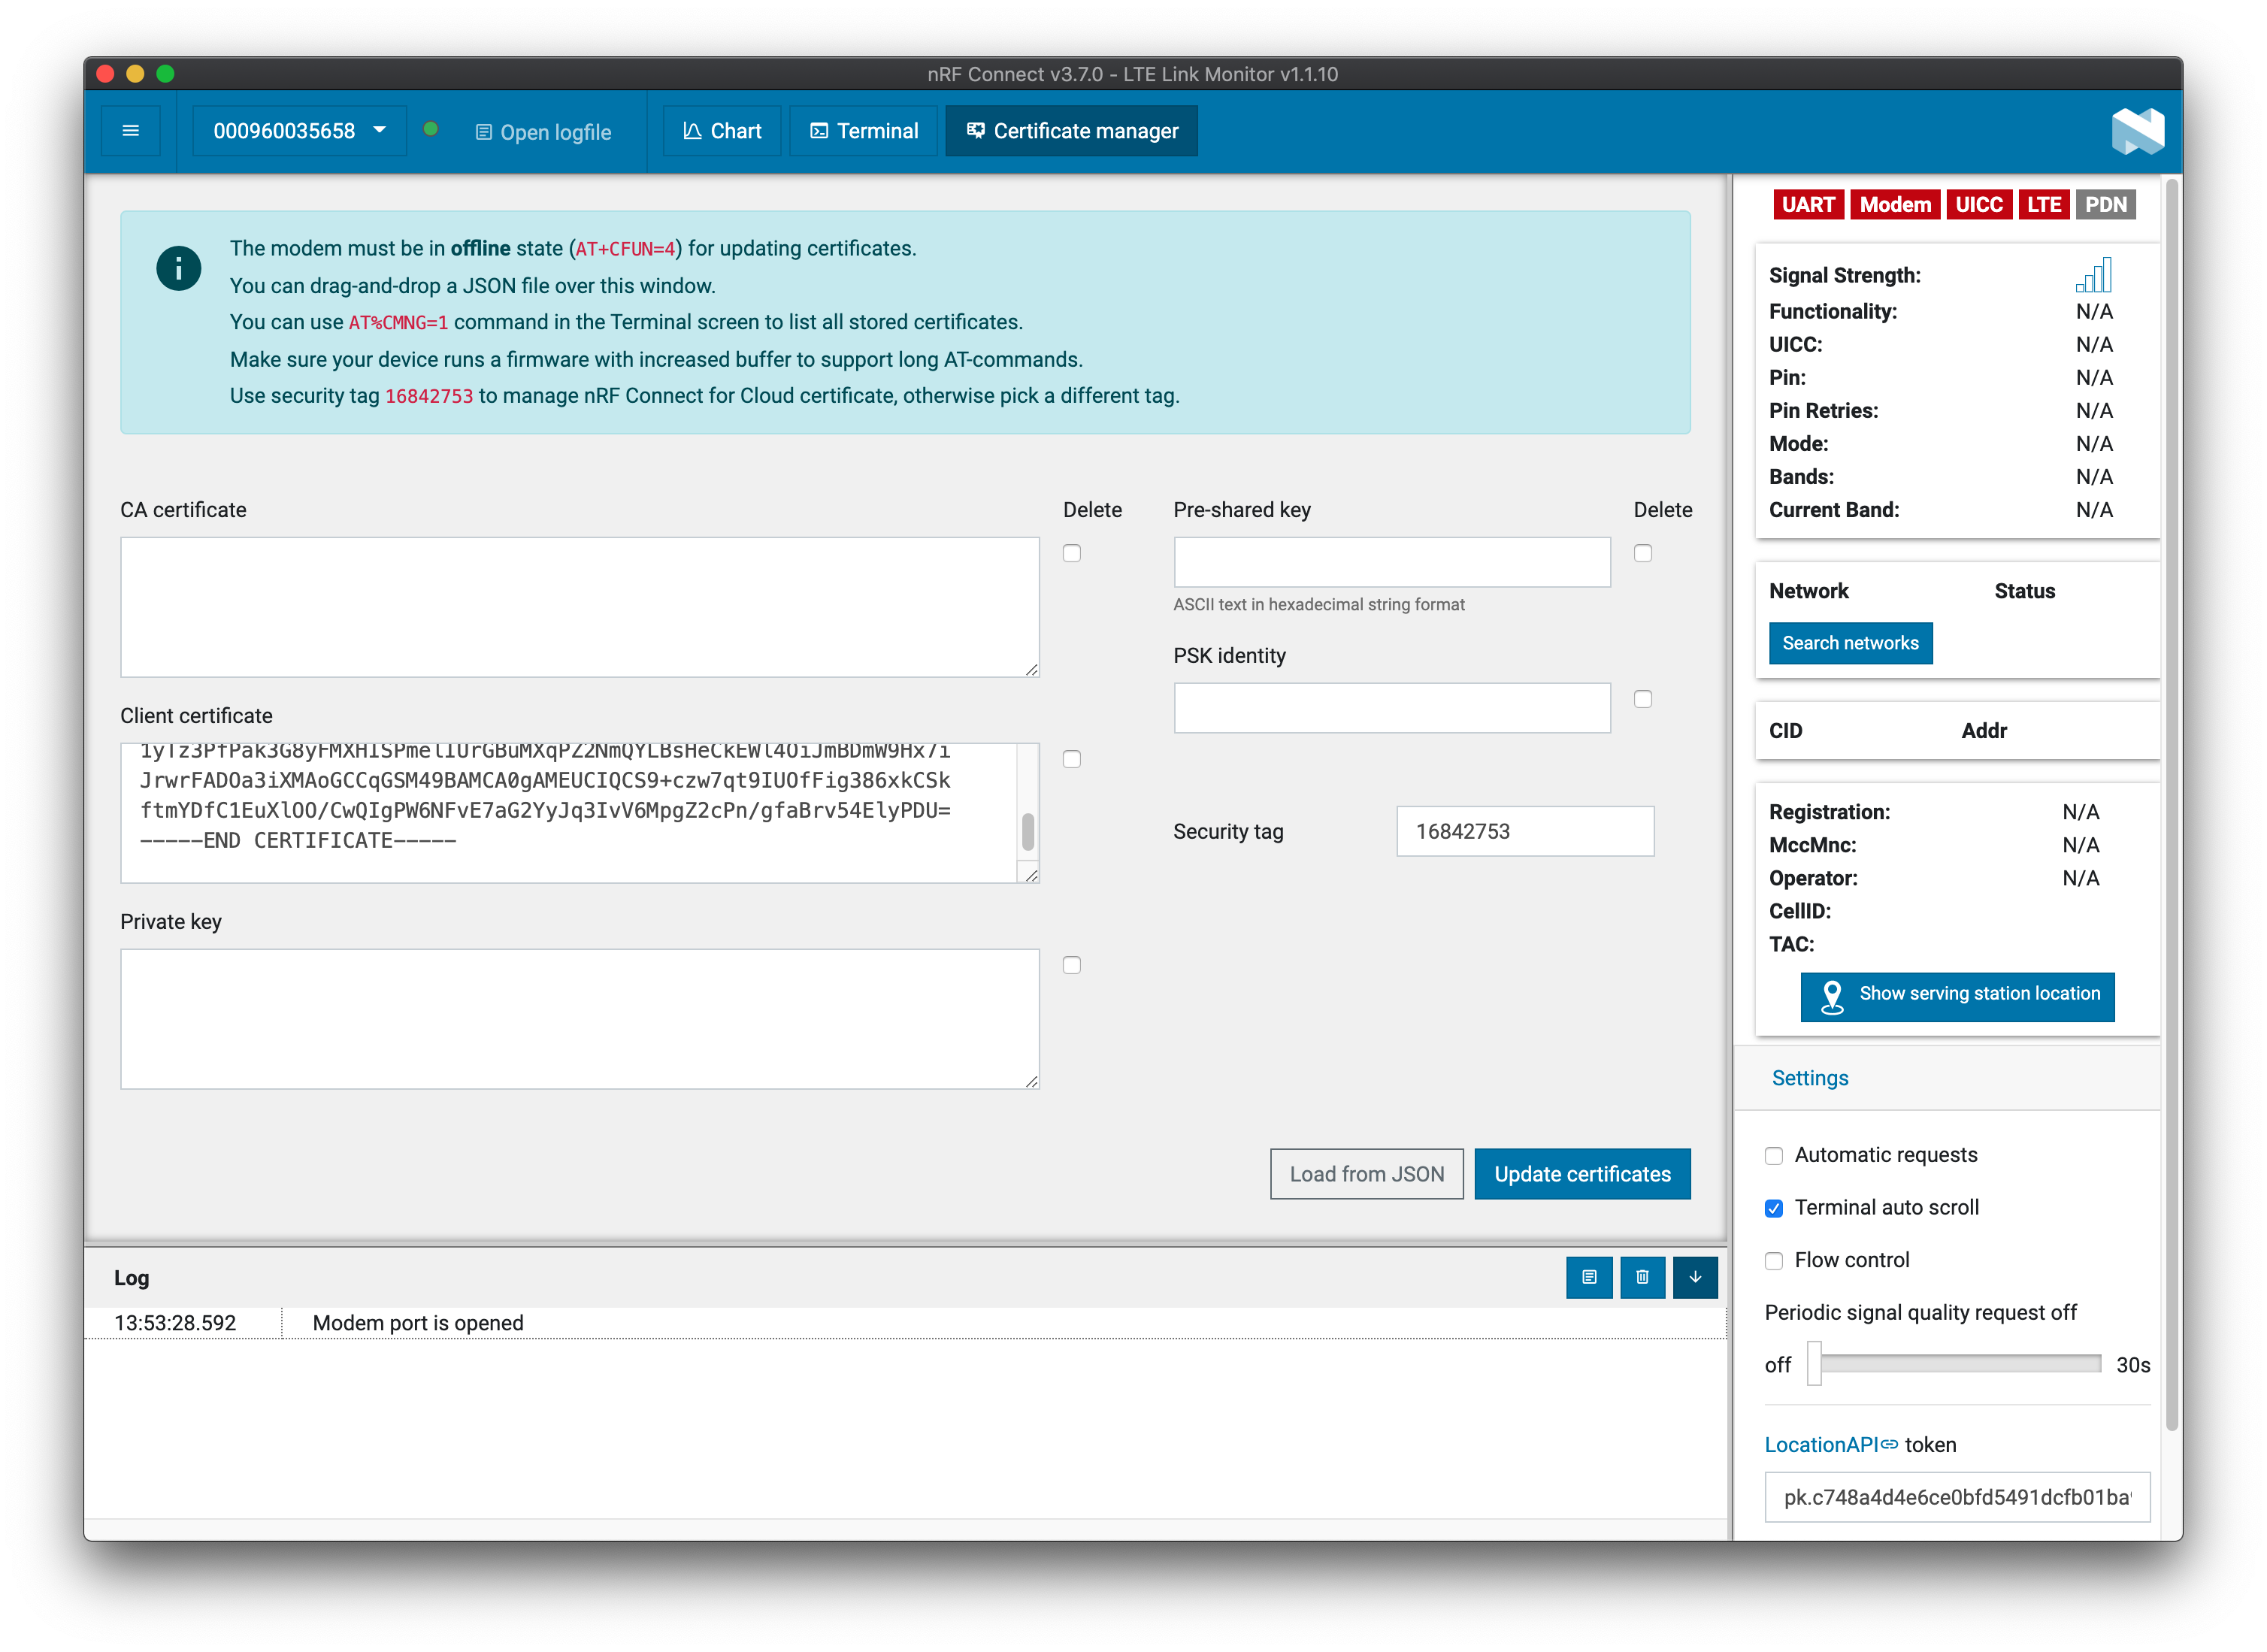
- Type your
<sec_tag>into the Security tag field. - Copy and paste the CA certificate into the CA certificate field.
- Copy and paste the device certificate into the Client certificate field.
- Copy and paste the private key into the Private key field.
Note
If you use KEYGEN to generate a private key, do not enter any data into the Private key field. If you enter data into this field, it will overwrite the key created by KEYGEN and you will need to start the process again.
Example of injecting a new device certificate
This screenshot of the LTE Link Monitor Certificate manager depicts injecting a new client (device) certificate to sec_tag 16842753:

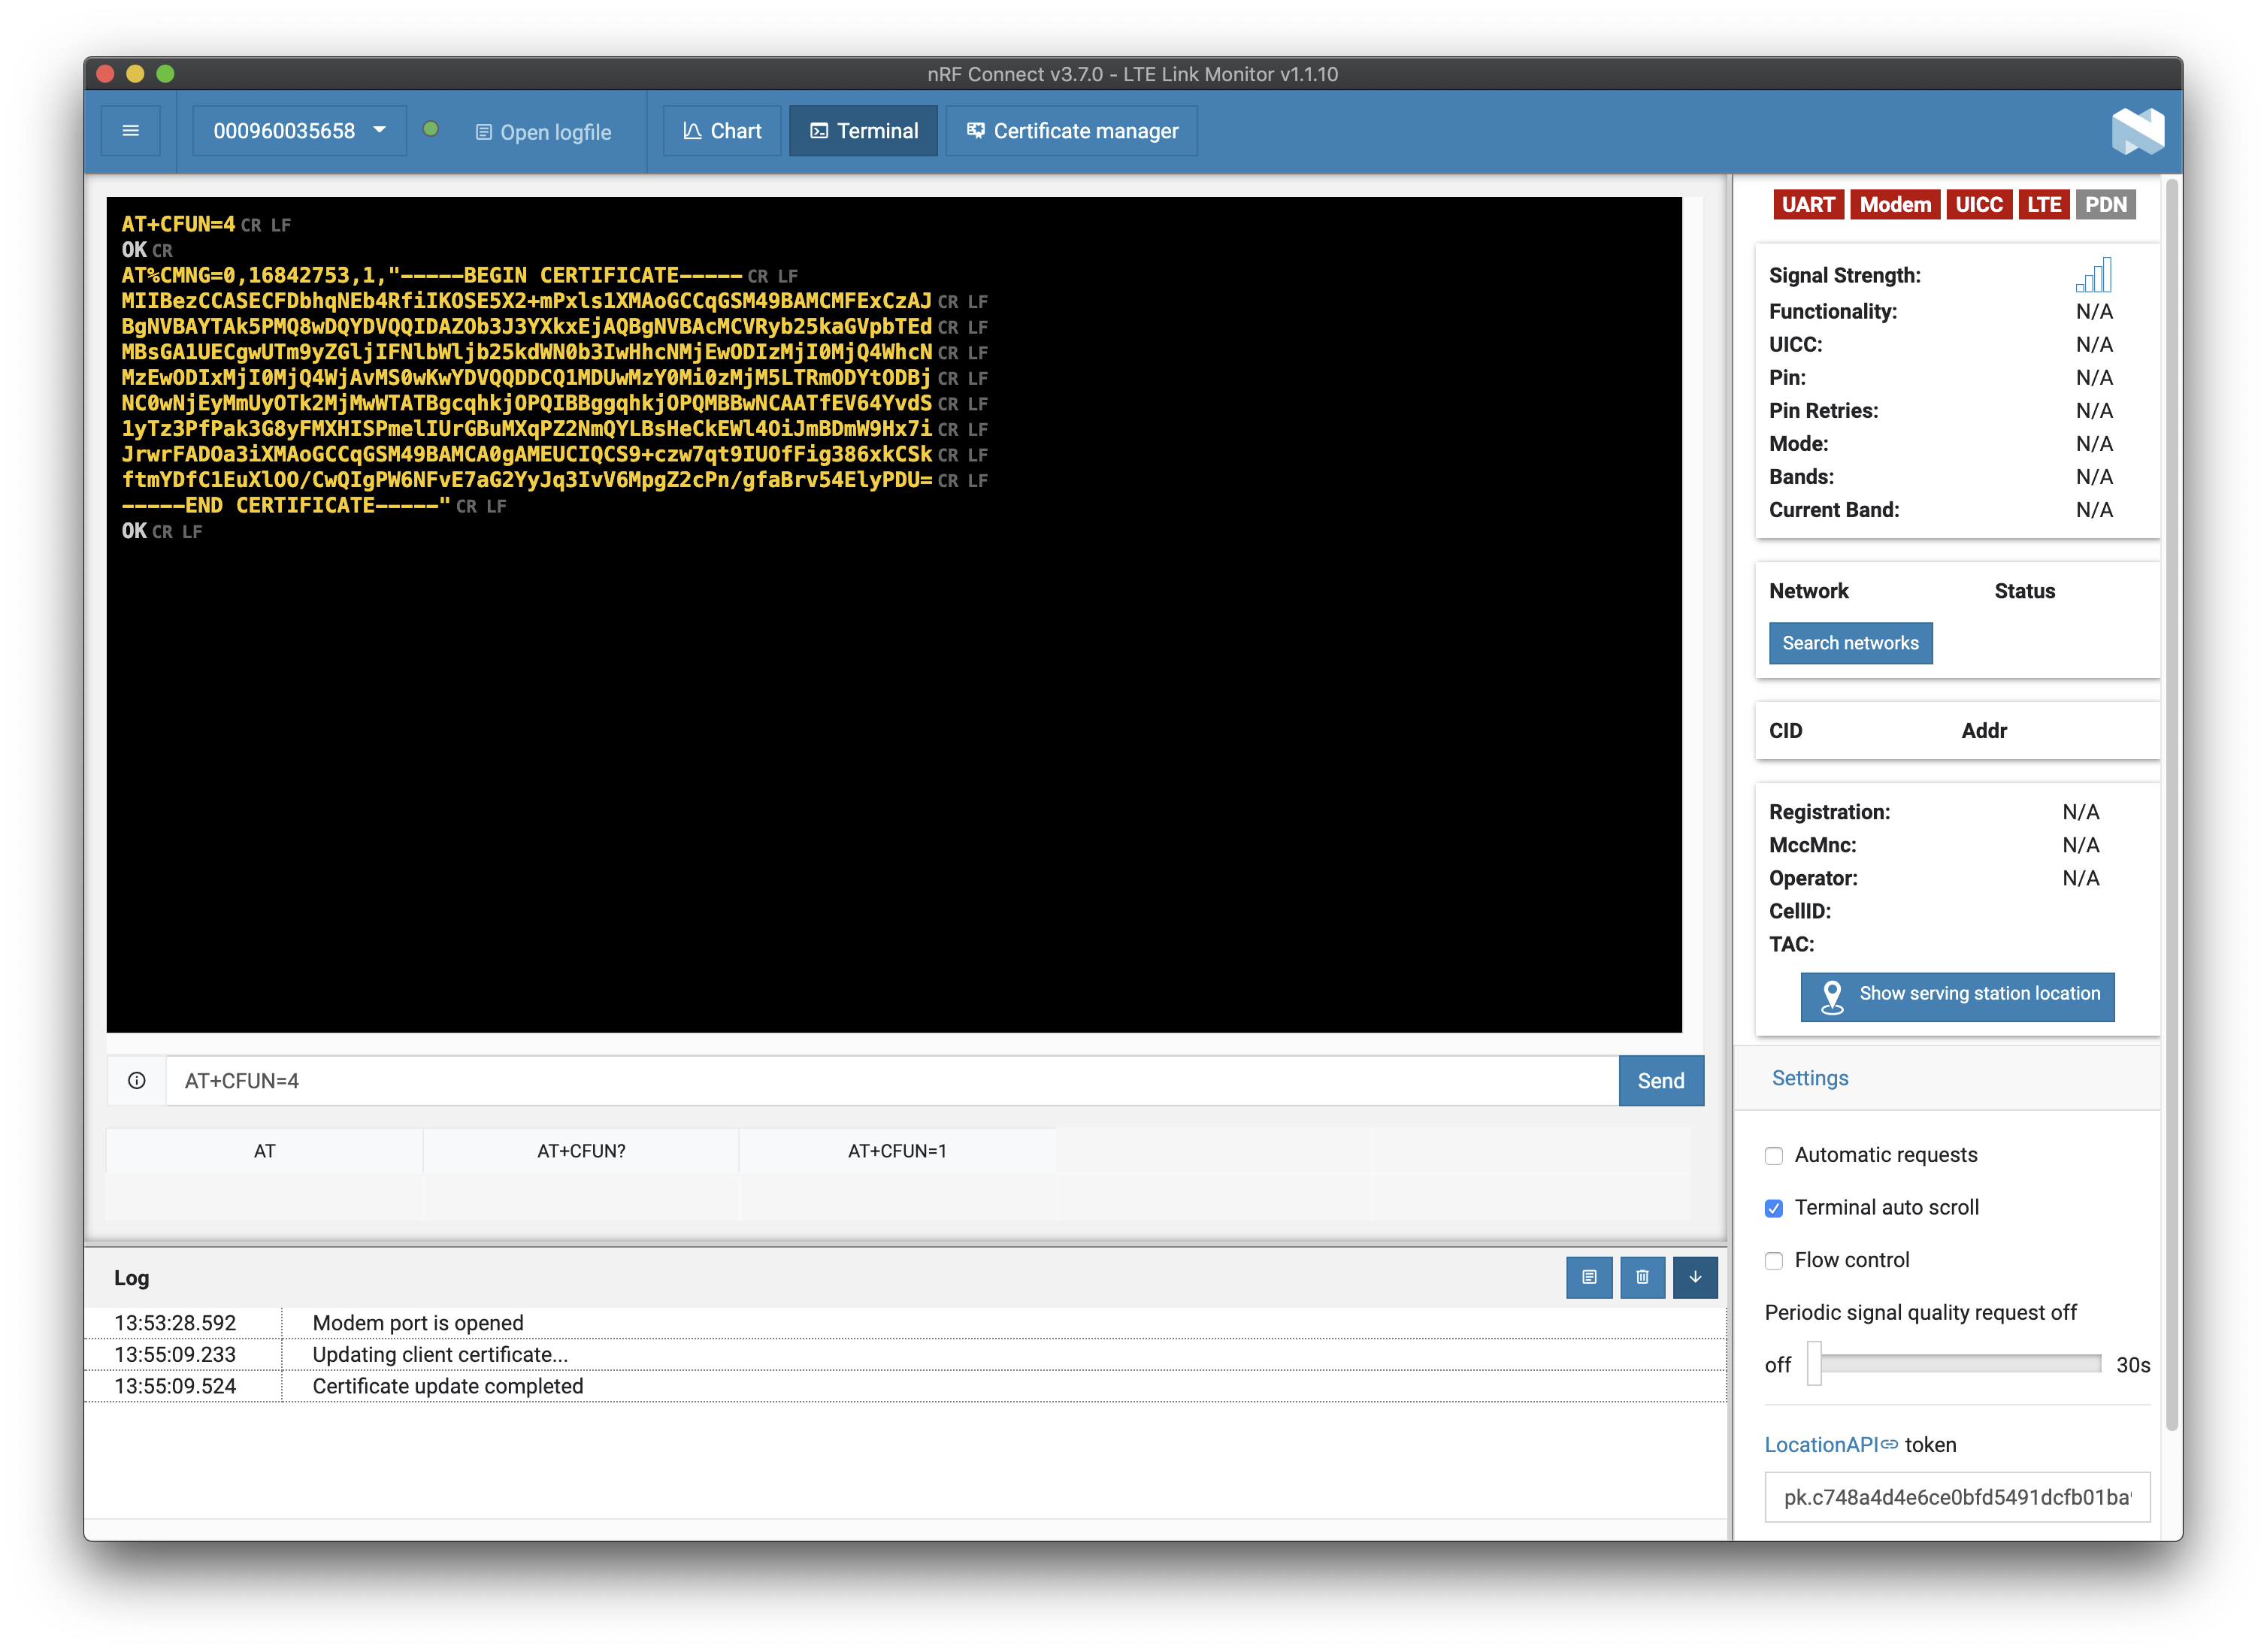
Click Update Certificates. The terminal returns the following:

Using AT commands
The LTE Link Monitor terminal does not properly format line breaks. If you are using the LTE Link Monitor application, use its Certificate manager.
Writing a CA certificate
To write a CA certificate to your device, give the following AT command:
AT%CMNG=0,<sec_tag>,0,"<CA_cert_text>"
Writing a device certificate
To write a device certificate to your device, give the following AT command:
AT%CMNG=0,<sec_tag>,1,"<device_cert_text>"
Writing a private key
To write a private key to your device, give the following AT command:
AT%CMNG=0,<sec_tag>,2,"<private_key_text>"